I am thrilled that Music Ed Tech Talk is sponsored by MusicFirst this month. What is MusicFirst? In their own words:
MusicFirst offers music educators and their students easy-to-use, affordable, cloud-based software that enables music learning, creation, assessment, sharing, and exploration on any device, anywhere, at any time.
MusicFirst Classroom is the only learning management system designed specifically for K-12 music education. It combines the flexibility of an LMS with engaging content and powerful software integrations to help manage your students’ progress, make lesson plans, and create assignments.
And for younger students, MusicFirst Junior is the perfect online system for teaching elementary general music. It includes a comprehensive K-5 curriculum, hundreds of lessons & songs, and kid-friendly graphics to making learning and creating music fun!
Whether you’re teaching remotely, in-person, or in a blended learning environment, MusicFirst will work with you to find a solution that fits your program’s unique needs. Try it free for 30 days at musicfirst.com.
This past school year, I piloted our district’s General Music II class. It marks the first time in our school system where a middle school level music class has built off of a prior year of skill development. Along with this development, our school’s Mac lab began to get phased out and replaced with Chromebooks.
I decided to invest in MusicFirst, a holistic, all-in-one, solution for teaching music with computers.
A small grant covered the cost of some low-end MIDI controllers, and my 8th graders were off! MusicFirst, and the integrated third party apps, blew open the doors. Suddenly we could compose notation with the clarity and creativity that Noteflight offers. Soundtrap, one of the digital audio workstations that you can bundle with a MusicFirst subscription, stores its content in the cloud, meaning students were never limited to the instruments or loops that happened to be installed on the Mac they sat down at that day.
To top it off, we were able to apply our piano skill from earlier in the semester to record our original parts into the computers. The fact that this software runs on the web means students can work on projects at home. It’s fantastic!
In March, when schools shifted to an online model, MusicFirst suddenly increased in value. I honestly don’t know how I would have taught my music class without it. Soundtrap kept students engaged in creating music once every week and collaborating on projects.
MusicFirst’s content library is massive. You can download an entire course-worth of units and lesson plans from dozens of pre-built classes.
In my early curiosity, I downloaded MusicFirst’s “Middle School Music Technology” class to my account and invited all of my students to it. I was able to easily drag and drop lessons and units from this course into dates on a calendar and have them appear as tasks to students. These lesson plans include clear instructions, engaging media, and assignments that link directly out to whatever software is required to get the task done.
For example, we spent some time learning the blues last spring. There is a unit in the pre-made music tech course that teaches students some blues basics. It starts with a lesson plan that has a pre-made playlist featuring artists like B. B. King. After listening to some recorded examples, it links students to a discussion task, where they can comment about the stylistic features of the music. Next, students move on to a lesson that explains the blues scale and links directly to a Soundtrap project, where the are tasked to record an improvisation using the notes of the blues scale. Saving their work in Soundtrap automatically saves it to the assignment in MusicFirst, where I can review and grade them all in the same place.
The pre-made content is a life saver if are teaching out of your content area and are feeling overwhelmed. Even if you are not, the content will speed things up for you. (Aggregating Spotify playlists, images, and instructions into a meaningfully structured lesson takes time, even if the ideas are already in your head!).
The course content is also fully customizable. In the blues example above, I wanted the improvisation assignment in Soundtrap to have a 12 bar bass line and shuffle beat pre-recorded, so that students felt like they were playing along to something. I was able to accomplish this, and saved a lot of time due to the instructions and embedded media having already been curated.
Give MusicFirst a try. It is such a comprehensive offering, that I am sure it can enhance your teaching! Click herefor more details.
When school let out in March, I wrote My Very Straightforward and Very Successful Setup for Teaching Virtual Private Lessons. The impetus for this post, and its snarky title, was an overwhelming number of teachers I saw on Facebook fussing about what apps and hardware they should use to teach online when all you really need is a smartphone, FaceTime, and maybe a tripod.
I stand by that post. But there are also reasons to go high-tech. I have had a lot of time this summer to reflect on the coming fall teaching semester. I have been experimenting with software and hardware solutions that are going to make my classes way more engaging.
Zoom
I have been hesitant about Zoom. I still have reservations about their software. Yet, it is hard to resist how customizable their desktop version is. I will be using Google Meet for my public school classes in September, but for my private lessons, I have been taking advantage of Zoom’s detailed features and settings.
For example, it’s easier to manage audio ins and outs. Right from the chat window, I can change if my voice input is going through my Mac’s internal microphone or my studio microphone, or if video is coming from my laptop webcam or my external Logitech webcam. This will also be useful for routing audio from apps into the call (we will get to that in a moment).
<div class="
      image-block-outer-wrapper
      layout-caption-below
      design-layout-inline
      combination-animation-none
      individual-animation-none
      individual-text-animation-none
    ">


    <figure class="
          sqs-block-image-figure
          intrinsic
        " style="max-width:2500px">


      <div class="image-block-wrapper">
        <div class="sqs-image-shape-container-element


          has-aspect-ratio
        " style="position: relative;padding-bottom:42.20000076293945%;overflow: hidden">


            <img src="https://images.squarespace-cdn.com/content/v1/5595df9ce4b0ce9ff9ecd1a8/1597075201184-OOWEFIAO8PYDRTX1UOAT/CleanShot+2020-08-10+at+11.02.33.png" alt="Zoom allows you to choose the audio/video input from right within the call." width="2500" height="1055" style="display:block;object-fit: cover;width: 100%;height: 100%;object-position: 50% 50%" loading="lazy">

        </div>
      </div>


      <figcaption class="image-caption-wrapper">
        <div class="image-caption"><p class="">Zoom allows you to choose the audio/video input from right within the call.</p></div>
      </figcaption>


    </figure>


</div>
Zoom also allows you to AirPlay the screen of an iOS device to the student as a screen sharing option. This is the main reason I have been experimenting with Zoom. Providing musical feedback is challenging over an internet-connected video call. Speaking slowly helps to convey thoughts accurately, but it helps a lot more when I say “start at measure 32” and the student sees me circle the spot I want them to start in the music, right on their phone.
You can get really detailed by zooming in and out of scores and annotating as little as a single note. If you are wondering, I am doing all of this on a 12.9 inch iPad Pro with Apple Pencil, using the forScore app. A tight feedback loop of “student performance—>teacher feedback—>student adjustment” is so important to good teaching, and a lot of it is lost during online lessons. It helps to get some of it back through the clarity and engagement of annotated sheet music.
<div class="
      image-block-outer-wrapper
      layout-caption-below
      design-layout-inline
      combination-animation-none
      individual-animation-none
      individual-text-animation-none
    ">


    <figure class="
          sqs-block-image-figure
          intrinsic
        " style="max-width:2500px">


      <div class="image-block-wrapper">
        <div class="sqs-image-shape-container-element


          has-aspect-ratio
        " style="position: relative;padding-bottom:42.20000076293945%;overflow: hidden">


            <img src="https://images.squarespace-cdn.com/content/v1/5595df9ce4b0ce9ff9ecd1a8/1597075253336-3D35PXRK7I734NAHHIN8/CleanShot+2020-08-10+at+11.03.17.png" alt="Selecting AirPlay as a screen sharing option." width="2500" height="1055" style="display:block;object-fit: cover;width: 100%;height: 100%;object-position: 50% 50%" loading="lazy">

        </div>
      </div>


      <figcaption class="image-caption-wrapper">
        <div class="image-caption"><p class="">Selecting AirPlay as a screen sharing option.</p></div>
      </figcaption>


    </figure>


</div>


<div class="
      image-block-outer-wrapper
      layout-caption-below
      design-layout-inline
      combination-animation-none
      individual-animation-none
      individual-text-animation-none
    ">


    <figure class="
          sqs-block-image-figure
          intrinsic
        " style="max-width:2500px">


      <div class="image-block-wrapper">
        <div class="sqs-image-shape-container-element


          has-aspect-ratio
        " style="position: relative;padding-bottom:42.20000076293945%;overflow: hidden">


            <img src="https://images.squarespace-cdn.com/content/v1/5595df9ce4b0ce9ff9ecd1a8/1597075390118-QA7W16X26KDSA9LT8512/CleanShot+2020-08-10+at+11.05.43.png" alt="AirPlaying annotated sheet music to the Zoom call using the iPad Pro and forScore app." width="2500" height="1055" style="display:block;object-fit: cover;width: 100%;height: 100%;object-position: 50% 50%" loading="lazy">

        </div>
      </div>


      <figcaption class="image-caption-wrapper">
        <div class="image-caption"><p class="">AirPlaying annotated sheet music to the Zoom call using the iPad Pro and forScore app.</p></div>
      </figcaption>


    </figure>


</div>
As much as I love this, I still think Zoom is pretty student hostile, particularly with the audio settings. Computers already try to normalize audio by taking extreme louds and compressing them. Given that my private lessons are on percussion instruments, this is very bad. Zoom is the worst at it of all the video apps I have used. To make it better, you have to turn on an option in the audio settings called “Use Original Audio” so that the host hears the student’s raw sound, not Zoom’s attempt to even it out. Some of my students report that they have to re-choose this option in the “Meeting Settings” of each new Zoom call.
If this experiment turns out to be worth it for the sheet music streaming, I will deal with it. But this is one of the reasons why I have been using simple apps like FaceTime up until this point.
I have been experimenting with a few apps by Rogue Amoeba that give me more control over how audio is flowing throughout my hardware and software.
Last Spring, I would often play my public school students YouTube videos, concert band recordings from Apple Music, and warm-up play-alongs that were embedded in Keynote slides. I was achieving this by having the sound of these sources come out of my computer speakers and right back into the microphone of my laptop. It actually works. But not for everyone. And not well.
Loopback is an app by Rogue Amoeba that allows you to combine the audio input and output of your various microphones, speakers, and apps, into new single audio devices that can be recognized by the system. I wrote about it here. My current set up includes a new audio device I created with Loopback which combines my audio interface and a bunch of frequently used audio apps into one. The resulting device is called Interface+Apps. If I select it as the input in my computer’s sound settings, then my students hear those apps and any microphone plugged into my audio interface directly. The audio quality of my apps is therefore more pure and direct, and there is no risk of getting an echo or feedback effect from my microphone picking up my computer speaker’s sound.
<div class="
      image-block-outer-wrapper
      layout-caption-below
      design-layout-inline
      combination-animation-none
      individual-animation-none
      individual-text-animation-none
    ">


    <figure class="
          sqs-block-image-figure
          intrinsic
        " style="max-width:1112px">


      <div class="image-block-wrapper">
        <div class="sqs-image-shape-container-element


          has-aspect-ratio
        " style="position: relative;padding-bottom:90.28776550292969%;overflow: hidden">


            <img src="https://images.squarespace-cdn.com/content/v1/5595df9ce4b0ce9ff9ecd1a8/1597075481531-T3RND7H6QZK7U88DPYPF/CleanShot+2020-08-10+at+11.07.26.png" alt="A Loopback device I created which combines the audio output of many apps with my audio interface into a new, compound device called “Interface+Apps.”" width="1112" height="1004" style="display:block;object-fit: cover;width: 100%;height: 100%;object-position: 50% 50%" loading="lazy">

        </div>
      </div>


      <figcaption class="image-caption-wrapper">
        <div class="image-caption"><p class="">A Loopback device I created which combines the audio output of many apps with my audio interface into a new, compound device called “Interface+Apps.”</p></div>
      </figcaption>


    </figure>


</div>


<div class="
      image-block-outer-wrapper
      layout-caption-below
      design-layout-inline
      combination-animation-none
      individual-animation-none
      individual-text-animation-none
    ">


    <figure class="
          sqs-block-image-figure
          intrinsic
        " style="max-width:780px">


      <div class="image-block-wrapper">
        <div class="sqs-image-shape-container-element


          has-aspect-ratio
        " style="position: relative;padding-bottom:78.20512390136719%;overflow: hidden">


            <img src="https://images.squarespace-cdn.com/content/v1/5595df9ce4b0ce9ff9ecd1a8/1597075501814-75OMM2CT6NQU8BBM81BQ/CleanShot+2020-08-10+at+11.08.54.png" alt="I can select this compound device from my Mac’s Sound settings." width="780" height="610" style="display:block;object-fit: cover;width: 100%;height: 100%;object-position: 50% 50%" loading="lazy">

        </div>
      </div>


      <figcaption class="image-caption-wrapper">
        <div class="image-caption"><p class="">I can select this compound device from my Mac’s Sound settings.</p></div>
      </figcaption>


    </figure>


</div>
Now I can do the following with a much higher level of quality…
Run a play-along band track and have a private student drum along
Play examples of professional bands for my band class on YouTube
Run Keynote slides that contain beats, tuning drones, and other play-along/reference tracks
and…
Logic Pro X
Logic Pro X is one of my apps routing through to the call via Loopback. I have a MIDI keyboard plugged into my audio interface and a Roland Octopad electronic drum pad that is plugged in as an audio source (though it can be used as a MIDI source too).
The sounds on the Roland Octopad are pretty authentic. I have hi-hat and bass drum foot pedal triggers so I can play it naturally. So in Logic, I start with an audio track that is monitoring the Octopad, and a software instrument track that is set to a piano (or marimba or xylophone, whatever is relevant). This way, I can model drum set or mallet parts for students quickly without leaving my desk. The audio I produce in Logic is routed through Loopback directly into the call. My students say the drum set, in particular, sounds way better in some instances than the quality of real instruments over internet-connected calls. Isn’t that something…
Obviously, there is a reason I have previously recommended a set up as simple as a smartphone and a tripod stand. Smartphones are very portable and convenient. And simple smartphone apps like FaceTime and Google Duo make a lot of good default choices about how to handle audio without the fiddly settings some of the more established “voice conference” platforms are known for.
Furthermore, I can’t pick up my desk and move it to my timpani or marimba if I need to model something. So I have begun experimenting with multiple camera angles. I bought a webcam back in March (it finally just shipped). I can use this as a secondary camera to my laptop’s camera (Command+Shift+N in Zoom to change cameras).
Alternatively, I can share my iPhone screen via AirPlay and turn on the camera app. Now I can get up from my desk and go wherever I need to. The student sees me wherever I go. This option is sometimes laggy.
Alternatively, I can log in to the call separately on the iPhone and Mac. This way, there are two instances of me, and if I need to, I can mute the studio desk microphone, and use the phone microphone so that students can hear me wherever I go. I like this option the best because it has the added benefit of showing me what meeting participants see in Zoom.
<div class="
      image-block-outer-wrapper
      layout-caption-below
      design-layout-inline
      combination-animation-none
      individual-animation-none
      individual-text-animation-none
    ">


    <figure class="
          sqs-block-image-figure
          intrinsic
        " style="max-width:1296px">


      <div class="image-block-wrapper">
        <div class="sqs-image-shape-container-element


          has-aspect-ratio
        " style="position: relative;padding-bottom:70.21604919433594%;overflow: hidden">


            <img src="https://images.squarespace-cdn.com/content/v1/5595df9ce4b0ce9ff9ecd1a8/1597075560578-KQFGYGMPES39PW5D9RUH/CleanShot+2020-08-10+at+11.52.56.png" alt="Logging in to the Zoom call on the Mac and iPhone gives me two different camera angles." width="1296" height="910" style="display:block;object-fit: cover;width: 100%;height: 100%;object-position: 50% 50%" loading="lazy">

        </div>
      </div>


      <figcaption class="image-caption-wrapper">
        <div class="image-caption"><p class="">Logging in to the Zoom call on the Mac and iPhone gives me two different camera angles.</p></div>
      </figcaption>


    </figure>


</div>
SoundSource
This process works well once it is set up. But it does take some fiddling around with audio ins and outs to get it right. SoundSource is another app by Rogue Amoeba that takes some of the fiddly-ness out of the equation. It replaces the sound options in your Mac’s menubar, offering your more control and more ease at the same time.
This app saved me from digging into the audio settings of my computer numerous times. In addition to putting audio device selection at a more surface level, it also lets you control the individual volume level of each app, apply audio effects to your apps, and more. One thing I do with it regularly is turn down the volume of just the Zoom app when my students play xylophone.
Rogue Amoeba’s apps will cost you, but they are worth it for those who want more audio control on the Mac. Make sure you take advantage of their educator discount.
EDIT: My teaching set up now includes the use of OBS and an Elago Stream Deck. Read more here.
Conclusion
I went a little overboard here. If this is overwhelming to you, don’t get the idea that you need to do it all. Anyone of these tweaks will advance your setup and teaching.
This post is not specific about the hardware I use. If you care about the brands and models of my gear, check out My Favorite Technology to read more about the specific audio equipment in my setup.
I am taking part in a Panel Discussion called “Teaching Music Online During the Pandemic” this Wednesday, August 5th. It is taking place on the Music Teachers Facebook Group at 8 pm through Zoom.
I will specifically be contributing ideas about practical instruction for performing ensembles. I am planning to discuss everything from large group rehearsal to break-out chamber ensembles, to music scanning apps, and software for assessing student performance.
Some great minds are involved. Here is a description of the panel from the Facebook Event:
Join us for a free online panel discussion with several of your Music Teacher Administrators and Moderators and special guests as we discuss the tools, techniques, and resources to move your music ensembles and music classrooms totally online or to a blended learning hybrid. Panelists include Jim Frankel, CEO of Music First; Katie Wardrobe, Director, Midnight Music Technology Training; Ron Kearns, retired HS band teacher; Tom West Blended Learning Instrumental Music teacher; Robby Burns, MS band teacher; Richard McCready, HS guitar teacher & music ministry; Tiffany Walker, MS band teacher; Krystal Williams, HS band teacher.
If you are interested, you can join the group here. Note: You will not be admitted into the group if you do not answer the questions.
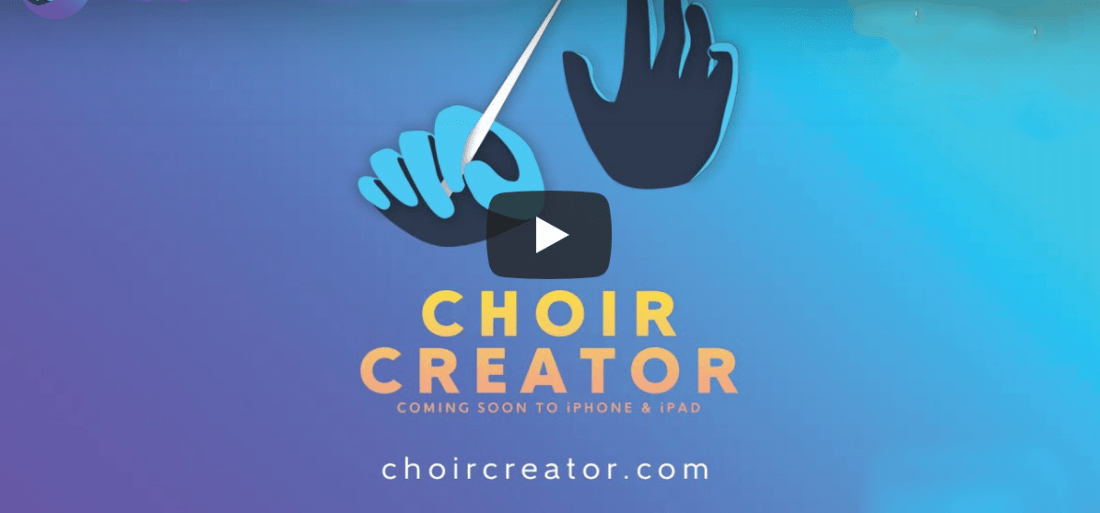
New app for creating virtual ensembles coming next month. Click the link to read more information directly from the developer’s website and sign up to be notified when it is released.
Choir Creator is the easiest way to organize and produce a virtual choir video. Releasing to the United States and Canada in August 2020 for iPhone and iPad running iOS 12.4 or later.
From the YouTube demo on the developer’s website, it looks like the workflow solves nearly all of the friction of this process. The business model of charging the teacher a considerable (but reasonable) amount of money and nothing to the student is solid.
That said, this process does not leave a lot of room for control. I would like to be able to, for example, turn up the tuba if it isn’t loud enough. I can think of numerous other ways that I would want to exercise more control than the output of this app would allow. That said, there is a strong market for software that makes it this easy. I think it may do well.
It’s iOS only at launch, which is not a surprise, but will limit school systems where students are using Chromebooks.
Edit: I have spoken with the developers of this app. They informed me that Choir Creator will support basic audio editing features at launch, like changing the volume and panning of each track. They said they have more audio editing features to come. Good to know!
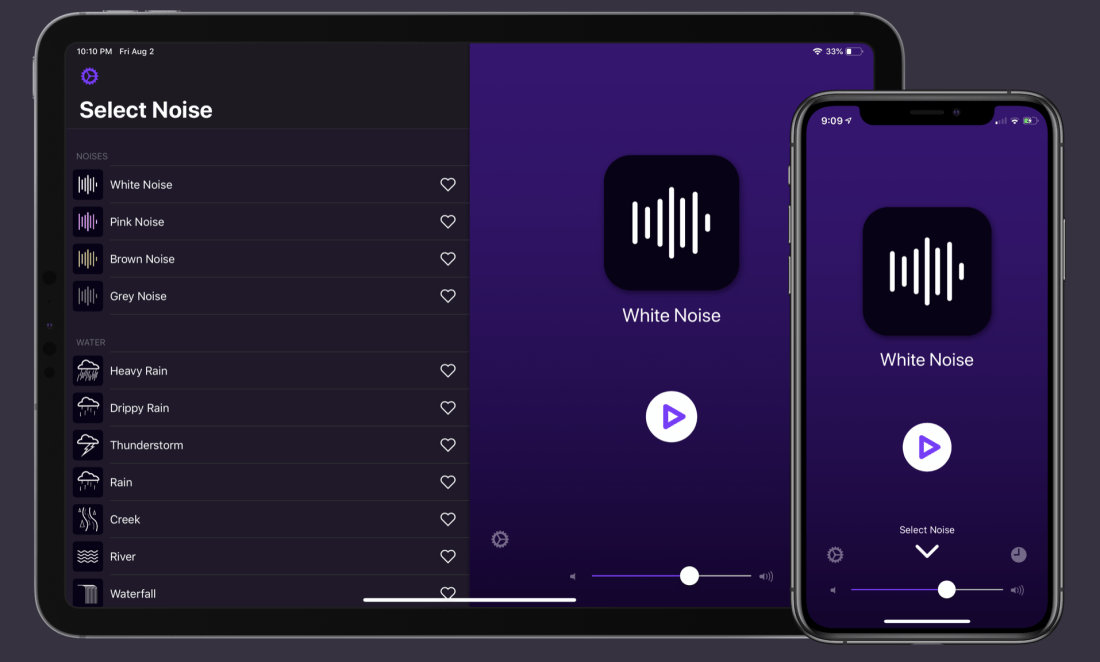
Now that many teachers are working from home, I have found that managing my environment is key to my sanity. Dark Noise elevates the idea of a noise machine to a premium level, offering a superior user experience and all sorts of power user tools like Siri Shortcuts integrations.
One of my favorite Shortcuts is called Lesson Planning. The shortcut puts my phone in Do Not Disturb mode, starts a time tracker, takes a predetermined sound in Dark Noise, and plays it in a particular AirPlay 2 speaker in my house. For me, that’s a Sonos Move speaker in the sun room.
That version of the Shortcut is intended for public use. My personal version of it adds a step to set the hue of the lights in that same room.
The shortcut can be set to go off when I ask Siri, by launching it from a widget, or by even installing it as an app icon on the homescreen. Its never beyond a tap away. My custom phrase is “Hey Siri, I’m working in the sun room.”
The new update includes some nice new features. Read this MacStories article for the details:
In Dark Noise 2 not only can you mix different sounds to create custom noises, but there are also eight new sound options to choose from, iCloud sync has been added for syncing your favorite sounds and custom mixes, and there’s optimized support for the iPadOS cursor. It’s a big release that retains the design elegance Dark Noise has had from day one, but expands the app’s usefulness in key ways.
Meredith Allen, Sales Enablement Manager at Soundtrap, joins the show to talk about using Soundtrap in the music classroom to create music and podcasts, getting acquired by Spotify, and wearing hard pants.
The school year is finally over, as is my first ever quarter of online teaching.
I wanted my students to end the year seeing themselves represented together, playing the same music, at the same time. So I sharpened my Final Cut skills and dove into the process of making a virtual ensemble.
The video in this post gives an overview of my process for making these videos, all the way from making a play along track, to advanced editing such as pitch and rhythm correction. The video includes a couple of my favorite Mac utilities for manipulating audio and video files. Scroll to the bottom to see all of the final videos of my students.
The Institute for Composer Diversity is curating special lists from their database, and their first one features wind band music! I am especially excited that this list includes works for beginners, an area that I find it typically challenging to program for. There is a lot of beginning music on this list to pick from.
Required state repertoire lists exist differently in every state in the U.S. and ICD, along with our partners in On The List and many others, wants to help to make sure those solo, chamber, and large ensemble lists appropriately provide students with music from many diverse voices. We’re starting with wind band works, but will grow this project to include choir, orchestra, jazz ensembles, and chamber works!
The lists below comprise a growing list of works for wind band composed or arranged by either a woman composer or a composer/arranger from an underrepresented heritage which have been selected by one or more U.S. state for repertoire lists. K-12 schools are required to perform works from these lists at district-and state-wide band festivals and competitions. Most of these works are in our Works Diversity Database (and those that aren’t will soon be)!
This is the second part in my series on using OmniFocus to stay on top of my teaching responsibilities. My last post, Staying On Top Of Teaching Responsibilities With Omnifocus Perspectives, details how I use custom Perspectives to ensure that I only see the tasks that are relevant to me in particular working contexts. Today, I am going to write about how I use TaskPaper templates to make sure I don’t forget steps of commonly repeated projects.
Why Project Templates?
As a band director, I have tons of repeating projects. There are numerous concerts a year, field trips, musical repertoire to stuff in folders, and substitutes to prepare lessons for. Usually, the tasks in these projects are the same, and have similar due dates relative to the date of the concert, substitute, or trip.
What is TaskPaper?
OmniFocus allows users to write templates for these projects in plain text using a special syntax called TaskPaper. The TaskPaper syntax is what is used by the application by the same name. It allows users to create and maintain complex projects with checkable tasks, each of which containing tags and due dates. There are no buttons or menus, everything is typed without lifting your hands off the keyboard.
A simple project in TaskPaper would use a colon after the title to bolden it and turn it into a project. Tasks are indicated by dashes, followed by spaces. And tags are indicated by an @ symbol. Therefore, a project with sub tasks and tags would look exactly like this…
OmniFocus Projects Templates use this same syntax and have added some custom features through the use of tagging. You can read about that syntax here.
OmniFocus Projects can look as simple as the example text above. But they can also use custom placeholders which prompt you to add dynamic data. If you put a string of characters in between the symbols ‘«’ and ‘»’, OmniFocus will treat it like a variable and prompt you to provide it. This means that if tag an item with the tag @due(«dateofperformance»), I will be asked what the date of the performance is, and then OmniFocus will add that due date to any tasks with that tag.
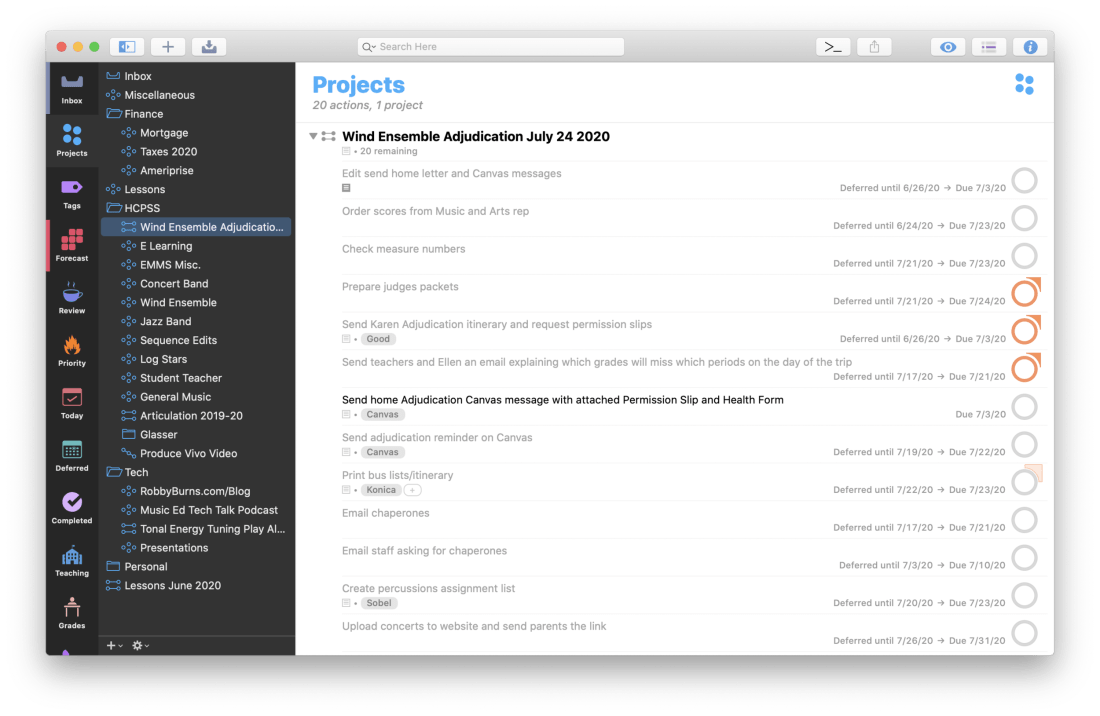
See my Concert Template below for an example.
Notice that most of my due dates have the minus symbol and a number after them followed by ‘d,’ ‘m,’ or ‘w,’ for days, months, and weeks, respectively. This adjusts the due date relative to the date I provide OmniFocus when prompted. Here is an example. When we perform a concert, the high school we feed into usually offers help from student volunteers in their Tri-M chapter. I need to get in touch with the Tri-M President at least 14 days before the date of the concert to ensure they have enough time to prepare, so I have added a -14d to the end of the date tag for that task. OmniFocus will not bother me about the task until that time.
There is also a Defer date tag associated with that same task. I can begin working on that task up to four weeks before it is due, so OmniFocus reveals it to me four weeks in advance, but doesn’t show it as due until I can’t survive the day without having done it.
Adding Projects to OmniFocus with Drafts
You may be wondering how I am actually triggering these templates to initiate in OmniFocus. As stated above, I am storing them all in Drafts. Drafts has a feature where you can create different workspaces for different buckets of text. I store my templates in the OmniFocus Template Workspace. In the image below, you will see a template for taking my band to their annual Assessment performance.
On the right side of Drafts there are some options which perform custom actions on my drafts. Users can create their own custom actions and share them with the community as Action Groups on the Drafts Action Directory. This particular set of actions was made by the brilliant Rosemary Orchard and shared on her blog here, where she also goes into great detail about using these two applications together.
The actions can be installed directly into Drafts. The topmost action is the one that takes the text of the draft and prompts me to add it to OmniFocus. The other actions along the right side add common TaskPaper syntax to the document wherever you cursor is. For example, tapping the ‘Due’ action will type ‘@due().’ This makes templates more fool-proof as you will be less likely to make a mistake with the syntax.
The image above depicts one of the prompts I receive when running the ‘TaskPaper to OmniFocus’ action in Drafts. Scroll to the top of this post to see what the resulting project looks like once it is in OmniFocus.
Out of Sight, Out of Mind
I spend most of my time in the Forecast view of OmniFocus which only shows me tasks that are deferred or due for that day, alongside the events in my calendar. Notice in the screenshot below that I don’t think about the deferred tasks on June 24th until I am actually looking at June 24th, thus allowing me to be calm and focused on other tasks on preceding days.
In my post on OmniFocus Perspectives, I talked about how I can focus my view on tasks that are relevant to certain working contexts. With Project Templates, I can focus on only the tasks that are relevant on certain days. They are otherwise out of sight, out of mind. The due dates ensure that I never miss a task.


You must be logged in to post a comment.