Most iPad video apps feature Picture in Picture mode (PiP), a feature that allows you to minimize the video in a corner of the screen while continuing to do work in other apps while watching or listening.
YouTube has been a holdout on this feature, even for YouTube Premium subscribers who get the background audio features (minus the background video). You can get PiP to work if you delete YouTube and watch on Safari instead (which is what I do).
Or, if you have the Scriptable app, you can also run this Siri Shortcut which will force a video you are watching in the YouTube app to open in Safari via PiP.
Someone on Reddit made an awesome Siri Shortcut that forces a YouTube video to open in Safari so you can run it in the background using the Picture in Picture feature. https://t.co/tr6e5psCEKpic.twitter.com/Lwv7Xmu7Fo
Or you could wait. It looks like YouTube might finally be testing their official support of PiP. Read MacRumors for more (and to learn how to force PiP by watching YouTube in Safari)…
YouTube appears to be testing Picture in Picture (PiP) mode for its iOS app, reports 9to5Mac. The feature allows users to watch YouTube videos while using other apps, and was discovered by developer Daniel Yount, who stumbled across it while viewing a YouTube live stream on his iPad.
Edit: This is only possible on iPhone if you are on iOS 14, which launches publicly this fall.
<div class="
      image-block-outer-wrapper
      layout-caption-below
      design-layout-inline
      combination-animation-none
      individual-animation-none
      individual-text-animation-none
    ">


    <figure class="
          sqs-block-image-figure
          intrinsic
        " style="max-width:1242px">


      <div class="image-block-wrapper">
        <div class="sqs-image-shape-container-element


          has-aspect-ratio
        " style="position: relative;padding-bottom:216.42510986328125%;overflow: hidden">


            <img src="https://images.squarespace-cdn.com/content/v1/5595df9ce4b0ce9ff9ecd1a8/1598787865547-47QGDI89VVMMXOIWOCID/IMG_CC24B8557240-1.jpeg" alt="We watching some Paak while managing my tasks on iPhone." width="1242" height="2688" style="display:block;object-fit: cover;width: 100%;height: 100%;object-position: 50% 50%" loading="lazy">

        </div>
      </div>


      <figcaption class="image-caption-wrapper">
        <div class="image-caption"><p class="">We watching some Paak while managing my tasks on iPhone.</p></div>
      </figcaption>


    </figure>


</div>
I am thrilled to announce that I will be joining Learn OmniFocus as a Workflow Guest on October 3rd, 2020.
Learn OmniFocus is a website dedicated to helping others live a fulfilling and productive life with OmniFocus, complementary productivity apps, and services.
You can learn a ton from their free resources, including basics like organizing tasks into projects and assigning tags to them. They also have information on advanced features like project templating and automation.
My session will be all about how I use OmniFocus and complementary productivity apps to keep my life as a teacher and musician together. Here is the session description:
Teacher, musician, and technologist, Robby Burns will be joining us from Ellicott City, Maryland to share how he uses OmniFocus and complementary productivity apps to keep his active life on track.
Robby has been using OmniFocus since 2010. He has a long history with Apple technologies and was originally drawn to OmniFocus’ deep integration with Apple’s operating systems. He especially appreciates that the Omni Group is quick to add support for new Apple technologies.
During the LIVE session, Robby will share details of his OmniFocus setup and workflows, including:
How and when he uses OmniFocus on his iPhone, iPad, and Mac.
Adjustments that he’s made to his use of OmniFocus and complementary productivity apps since switching from in-person to virtual teaching.
His strategy for using tags.
How he uses the Forecast perspective to keep his calendar lined up with his commitments.
How he uses defer dates to relieve the stress of seeing too many things at once.
Custom perspectives that help him hone in on his most important tasks, including his “Top 3” perspective that narrows his focus to only three items.
How he creates OmniFocus projects based on templates stored in Drafts.
Read more and register here. The session will have a live Q/A and members can interact and share ideas. I hope to see you there!
You can become a member of Learn OmniFocus here. They have educator and student discounts. It is worth checking out if you wish to be more productive!
A free recording of the video will be made available to everyone by October 10.
When school let out in March, I wrote My Very Straightforward and Very Successful Setup for Teaching Virtual Private Lessons. The impetus for this post, and its snarky title, was an overwhelming number of teachers I saw on Facebook fussing about what apps and hardware they should use to teach online when all you really need is a smartphone, FaceTime, and maybe a tripod.
I stand by that post. But there are also reasons to go high-tech. I have had a lot of time this summer to reflect on the coming fall teaching semester. I have been experimenting with software and hardware solutions that are going to make my classes way more engaging.
Zoom
I have been hesitant about Zoom. I still have reservations about their software. Yet, it is hard to resist how customizable their desktop version is. I will be using Google Meet for my public school classes in September, but for my private lessons, I have been taking advantage of Zoom’s detailed features and settings.
For example, it’s easier to manage audio ins and outs. Right from the chat window, I can change if my voice input is going through my Mac’s internal microphone or my studio microphone, or if video is coming from my laptop webcam or my external Logitech webcam. This will also be useful for routing audio from apps into the call (we will get to that in a moment).
<div class="
      image-block-outer-wrapper
      layout-caption-below
      design-layout-inline
      combination-animation-none
      individual-animation-none
      individual-text-animation-none
    ">


    <figure class="
          sqs-block-image-figure
          intrinsic
        " style="max-width:2500px">


      <div class="image-block-wrapper">
        <div class="sqs-image-shape-container-element


          has-aspect-ratio
        " style="position: relative;padding-bottom:42.20000076293945%;overflow: hidden">


            <img src="https://images.squarespace-cdn.com/content/v1/5595df9ce4b0ce9ff9ecd1a8/1597075201184-OOWEFIAO8PYDRTX1UOAT/CleanShot+2020-08-10+at+11.02.33.png" alt="Zoom allows you to choose the audio/video input from right within the call." width="2500" height="1055" style="display:block;object-fit: cover;width: 100%;height: 100%;object-position: 50% 50%" loading="lazy">

        </div>
      </div>


      <figcaption class="image-caption-wrapper">
        <div class="image-caption"><p class="">Zoom allows you to choose the audio/video input from right within the call.</p></div>
      </figcaption>


    </figure>


</div>
Zoom also allows you to AirPlay the screen of an iOS device to the student as a screen sharing option. This is the main reason I have been experimenting with Zoom. Providing musical feedback is challenging over an internet-connected video call. Speaking slowly helps to convey thoughts accurately, but it helps a lot more when I say “start at measure 32” and the student sees me circle the spot I want them to start in the music, right on their phone.
You can get really detailed by zooming in and out of scores and annotating as little as a single note. If you are wondering, I am doing all of this on a 12.9 inch iPad Pro with Apple Pencil, using the forScore app. A tight feedback loop of “student performance—>teacher feedback—>student adjustment” is so important to good teaching, and a lot of it is lost during online lessons. It helps to get some of it back through the clarity and engagement of annotated sheet music.
<div class="
      image-block-outer-wrapper
      layout-caption-below
      design-layout-inline
      combination-animation-none
      individual-animation-none
      individual-text-animation-none
    ">


    <figure class="
          sqs-block-image-figure
          intrinsic
        " style="max-width:2500px">


      <div class="image-block-wrapper">
        <div class="sqs-image-shape-container-element


          has-aspect-ratio
        " style="position: relative;padding-bottom:42.20000076293945%;overflow: hidden">


            <img src="https://images.squarespace-cdn.com/content/v1/5595df9ce4b0ce9ff9ecd1a8/1597075253336-3D35PXRK7I734NAHHIN8/CleanShot+2020-08-10+at+11.03.17.png" alt="Selecting AirPlay as a screen sharing option." width="2500" height="1055" style="display:block;object-fit: cover;width: 100%;height: 100%;object-position: 50% 50%" loading="lazy">

        </div>
      </div>


      <figcaption class="image-caption-wrapper">
        <div class="image-caption"><p class="">Selecting AirPlay as a screen sharing option.</p></div>
      </figcaption>


    </figure>


</div>


<div class="
      image-block-outer-wrapper
      layout-caption-below
      design-layout-inline
      combination-animation-none
      individual-animation-none
      individual-text-animation-none
    ">


    <figure class="
          sqs-block-image-figure
          intrinsic
        " style="max-width:2500px">


      <div class="image-block-wrapper">
        <div class="sqs-image-shape-container-element


          has-aspect-ratio
        " style="position: relative;padding-bottom:42.20000076293945%;overflow: hidden">


            <img src="https://images.squarespace-cdn.com/content/v1/5595df9ce4b0ce9ff9ecd1a8/1597075390118-QA7W16X26KDSA9LT8512/CleanShot+2020-08-10+at+11.05.43.png" alt="AirPlaying annotated sheet music to the Zoom call using the iPad Pro and forScore app." width="2500" height="1055" style="display:block;object-fit: cover;width: 100%;height: 100%;object-position: 50% 50%" loading="lazy">

        </div>
      </div>


      <figcaption class="image-caption-wrapper">
        <div class="image-caption"><p class="">AirPlaying annotated sheet music to the Zoom call using the iPad Pro and forScore app.</p></div>
      </figcaption>


    </figure>


</div>
As much as I love this, I still think Zoom is pretty student hostile, particularly with the audio settings. Computers already try to normalize audio by taking extreme louds and compressing them. Given that my private lessons are on percussion instruments, this is very bad. Zoom is the worst at it of all the video apps I have used. To make it better, you have to turn on an option in the audio settings called “Use Original Audio” so that the host hears the student’s raw sound, not Zoom’s attempt to even it out. Some of my students report that they have to re-choose this option in the “Meeting Settings” of each new Zoom call.
If this experiment turns out to be worth it for the sheet music streaming, I will deal with it. But this is one of the reasons why I have been using simple apps like FaceTime up until this point.
I have been experimenting with a few apps by Rogue Amoeba that give me more control over how audio is flowing throughout my hardware and software.
Last Spring, I would often play my public school students YouTube videos, concert band recordings from Apple Music, and warm-up play-alongs that were embedded in Keynote slides. I was achieving this by having the sound of these sources come out of my computer speakers and right back into the microphone of my laptop. It actually works. But not for everyone. And not well.
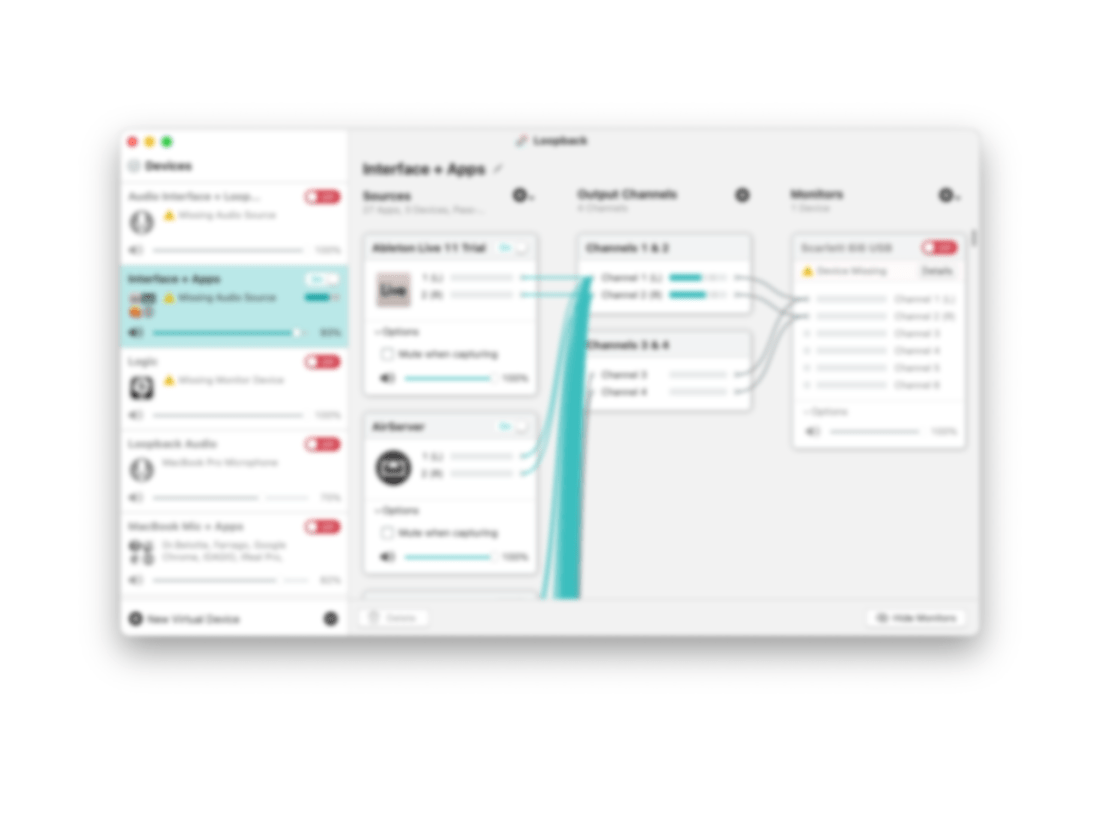
Loopback is an app by Rogue Amoeba that allows you to combine the audio input and output of your various microphones, speakers, and apps, into new single audio devices that can be recognized by the system. I wrote about it here. My current set up includes a new audio device I created with Loopback which combines my audio interface and a bunch of frequently used audio apps into one. The resulting device is called Interface+Apps. If I select it as the input in my computer’s sound settings, then my students hear those apps and any microphone plugged into my audio interface directly. The audio quality of my apps is therefore more pure and direct, and there is no risk of getting an echo or feedback effect from my microphone picking up my computer speaker’s sound.
<div class="
      image-block-outer-wrapper
      layout-caption-below
      design-layout-inline
      combination-animation-none
      individual-animation-none
      individual-text-animation-none
    ">


    <figure class="
          sqs-block-image-figure
          intrinsic
        " style="max-width:1112px">


      <div class="image-block-wrapper">
        <div class="sqs-image-shape-container-element


          has-aspect-ratio
        " style="position: relative;padding-bottom:90.28776550292969%;overflow: hidden">


            <img src="https://images.squarespace-cdn.com/content/v1/5595df9ce4b0ce9ff9ecd1a8/1597075481531-T3RND7H6QZK7U88DPYPF/CleanShot+2020-08-10+at+11.07.26.png" alt="A Loopback device I created which combines the audio output of many apps with my audio interface into a new, compound device called “Interface+Apps.”" width="1112" height="1004" style="display:block;object-fit: cover;width: 100%;height: 100%;object-position: 50% 50%" loading="lazy">

        </div>
      </div>


      <figcaption class="image-caption-wrapper">
        <div class="image-caption"><p class="">A Loopback device I created which combines the audio output of many apps with my audio interface into a new, compound device called “Interface+Apps.”</p></div>
      </figcaption>


    </figure>


</div>


<div class="
      image-block-outer-wrapper
      layout-caption-below
      design-layout-inline
      combination-animation-none
      individual-animation-none
      individual-text-animation-none
    ">


    <figure class="
          sqs-block-image-figure
          intrinsic
        " style="max-width:780px">


      <div class="image-block-wrapper">
        <div class="sqs-image-shape-container-element


          has-aspect-ratio
        " style="position: relative;padding-bottom:78.20512390136719%;overflow: hidden">


            <img src="https://images.squarespace-cdn.com/content/v1/5595df9ce4b0ce9ff9ecd1a8/1597075501814-75OMM2CT6NQU8BBM81BQ/CleanShot+2020-08-10+at+11.08.54.png" alt="I can select this compound device from my Mac’s Sound settings." width="780" height="610" style="display:block;object-fit: cover;width: 100%;height: 100%;object-position: 50% 50%" loading="lazy">

        </div>
      </div>


      <figcaption class="image-caption-wrapper">
        <div class="image-caption"><p class="">I can select this compound device from my Mac’s Sound settings.</p></div>
      </figcaption>


    </figure>


</div>
Now I can do the following with a much higher level of quality…
Run a play-along band track and have a private student drum along
Play examples of professional bands for my band class on YouTube
Run Keynote slides that contain beats, tuning drones, and other play-along/reference tracks
and…
Logic Pro X
Logic Pro X is one of my apps routing through to the call via Loopback. I have a MIDI keyboard plugged into my audio interface and a Roland Octopad electronic drum pad that is plugged in as an audio source (though it can be used as a MIDI source too).
The sounds on the Roland Octopad are pretty authentic. I have hi-hat and bass drum foot pedal triggers so I can play it naturally. So in Logic, I start with an audio track that is monitoring the Octopad, and a software instrument track that is set to a piano (or marimba or xylophone, whatever is relevant). This way, I can model drum set or mallet parts for students quickly without leaving my desk. The audio I produce in Logic is routed through Loopback directly into the call. My students say the drum set, in particular, sounds way better in some instances than the quality of real instruments over internet-connected calls. Isn’t that something…
Obviously, there is a reason I have previously recommended a set up as simple as a smartphone and a tripod stand. Smartphones are very portable and convenient. And simple smartphone apps like FaceTime and Google Duo make a lot of good default choices about how to handle audio without the fiddly settings some of the more established “voice conference” platforms are known for.
Furthermore, I can’t pick up my desk and move it to my timpani or marimba if I need to model something. So I have begun experimenting with multiple camera angles. I bought a webcam back in March (it finally just shipped). I can use this as a secondary camera to my laptop’s camera (Command+Shift+N in Zoom to change cameras).
Alternatively, I can share my iPhone screen via AirPlay and turn on the camera app. Now I can get up from my desk and go wherever I need to. The student sees me wherever I go. This option is sometimes laggy.
Alternatively, I can log in to the call separately on the iPhone and Mac. This way, there are two instances of me, and if I need to, I can mute the studio desk microphone, and use the phone microphone so that students can hear me wherever I go. I like this option the best because it has the added benefit of showing me what meeting participants see in Zoom.
<div class="
      image-block-outer-wrapper
      layout-caption-below
      design-layout-inline
      combination-animation-none
      individual-animation-none
      individual-text-animation-none
    ">


    <figure class="
          sqs-block-image-figure
          intrinsic
        " style="max-width:1296px">


      <div class="image-block-wrapper">
        <div class="sqs-image-shape-container-element


          has-aspect-ratio
        " style="position: relative;padding-bottom:70.21604919433594%;overflow: hidden">


            <img src="https://images.squarespace-cdn.com/content/v1/5595df9ce4b0ce9ff9ecd1a8/1597075560578-KQFGYGMPES39PW5D9RUH/CleanShot+2020-08-10+at+11.52.56.png" alt="Logging in to the Zoom call on the Mac and iPhone gives me two different camera angles." width="1296" height="910" style="display:block;object-fit: cover;width: 100%;height: 100%;object-position: 50% 50%" loading="lazy">

        </div>
      </div>


      <figcaption class="image-caption-wrapper">
        <div class="image-caption"><p class="">Logging in to the Zoom call on the Mac and iPhone gives me two different camera angles.</p></div>
      </figcaption>


    </figure>


</div>
SoundSource
This process works well once it is set up. But it does take some fiddling around with audio ins and outs to get it right. SoundSource is another app by Rogue Amoeba that takes some of the fiddly-ness out of the equation. It replaces the sound options in your Mac’s menubar, offering your more control and more ease at the same time.
This app saved me from digging into the audio settings of my computer numerous times. In addition to putting audio device selection at a more surface level, it also lets you control the individual volume level of each app, apply audio effects to your apps, and more. One thing I do with it regularly is turn down the volume of just the Zoom app when my students play xylophone.
Rogue Amoeba’s apps will cost you, but they are worth it for those who want more audio control on the Mac. Make sure you take advantage of their educator discount.
EDIT: My teaching set up now includes the use of OBS and an Elago Stream Deck. Read more here.
Conclusion
I went a little overboard here. If this is overwhelming to you, don’t get the idea that you need to do it all. Anyone of these tweaks will advance your setup and teaching.
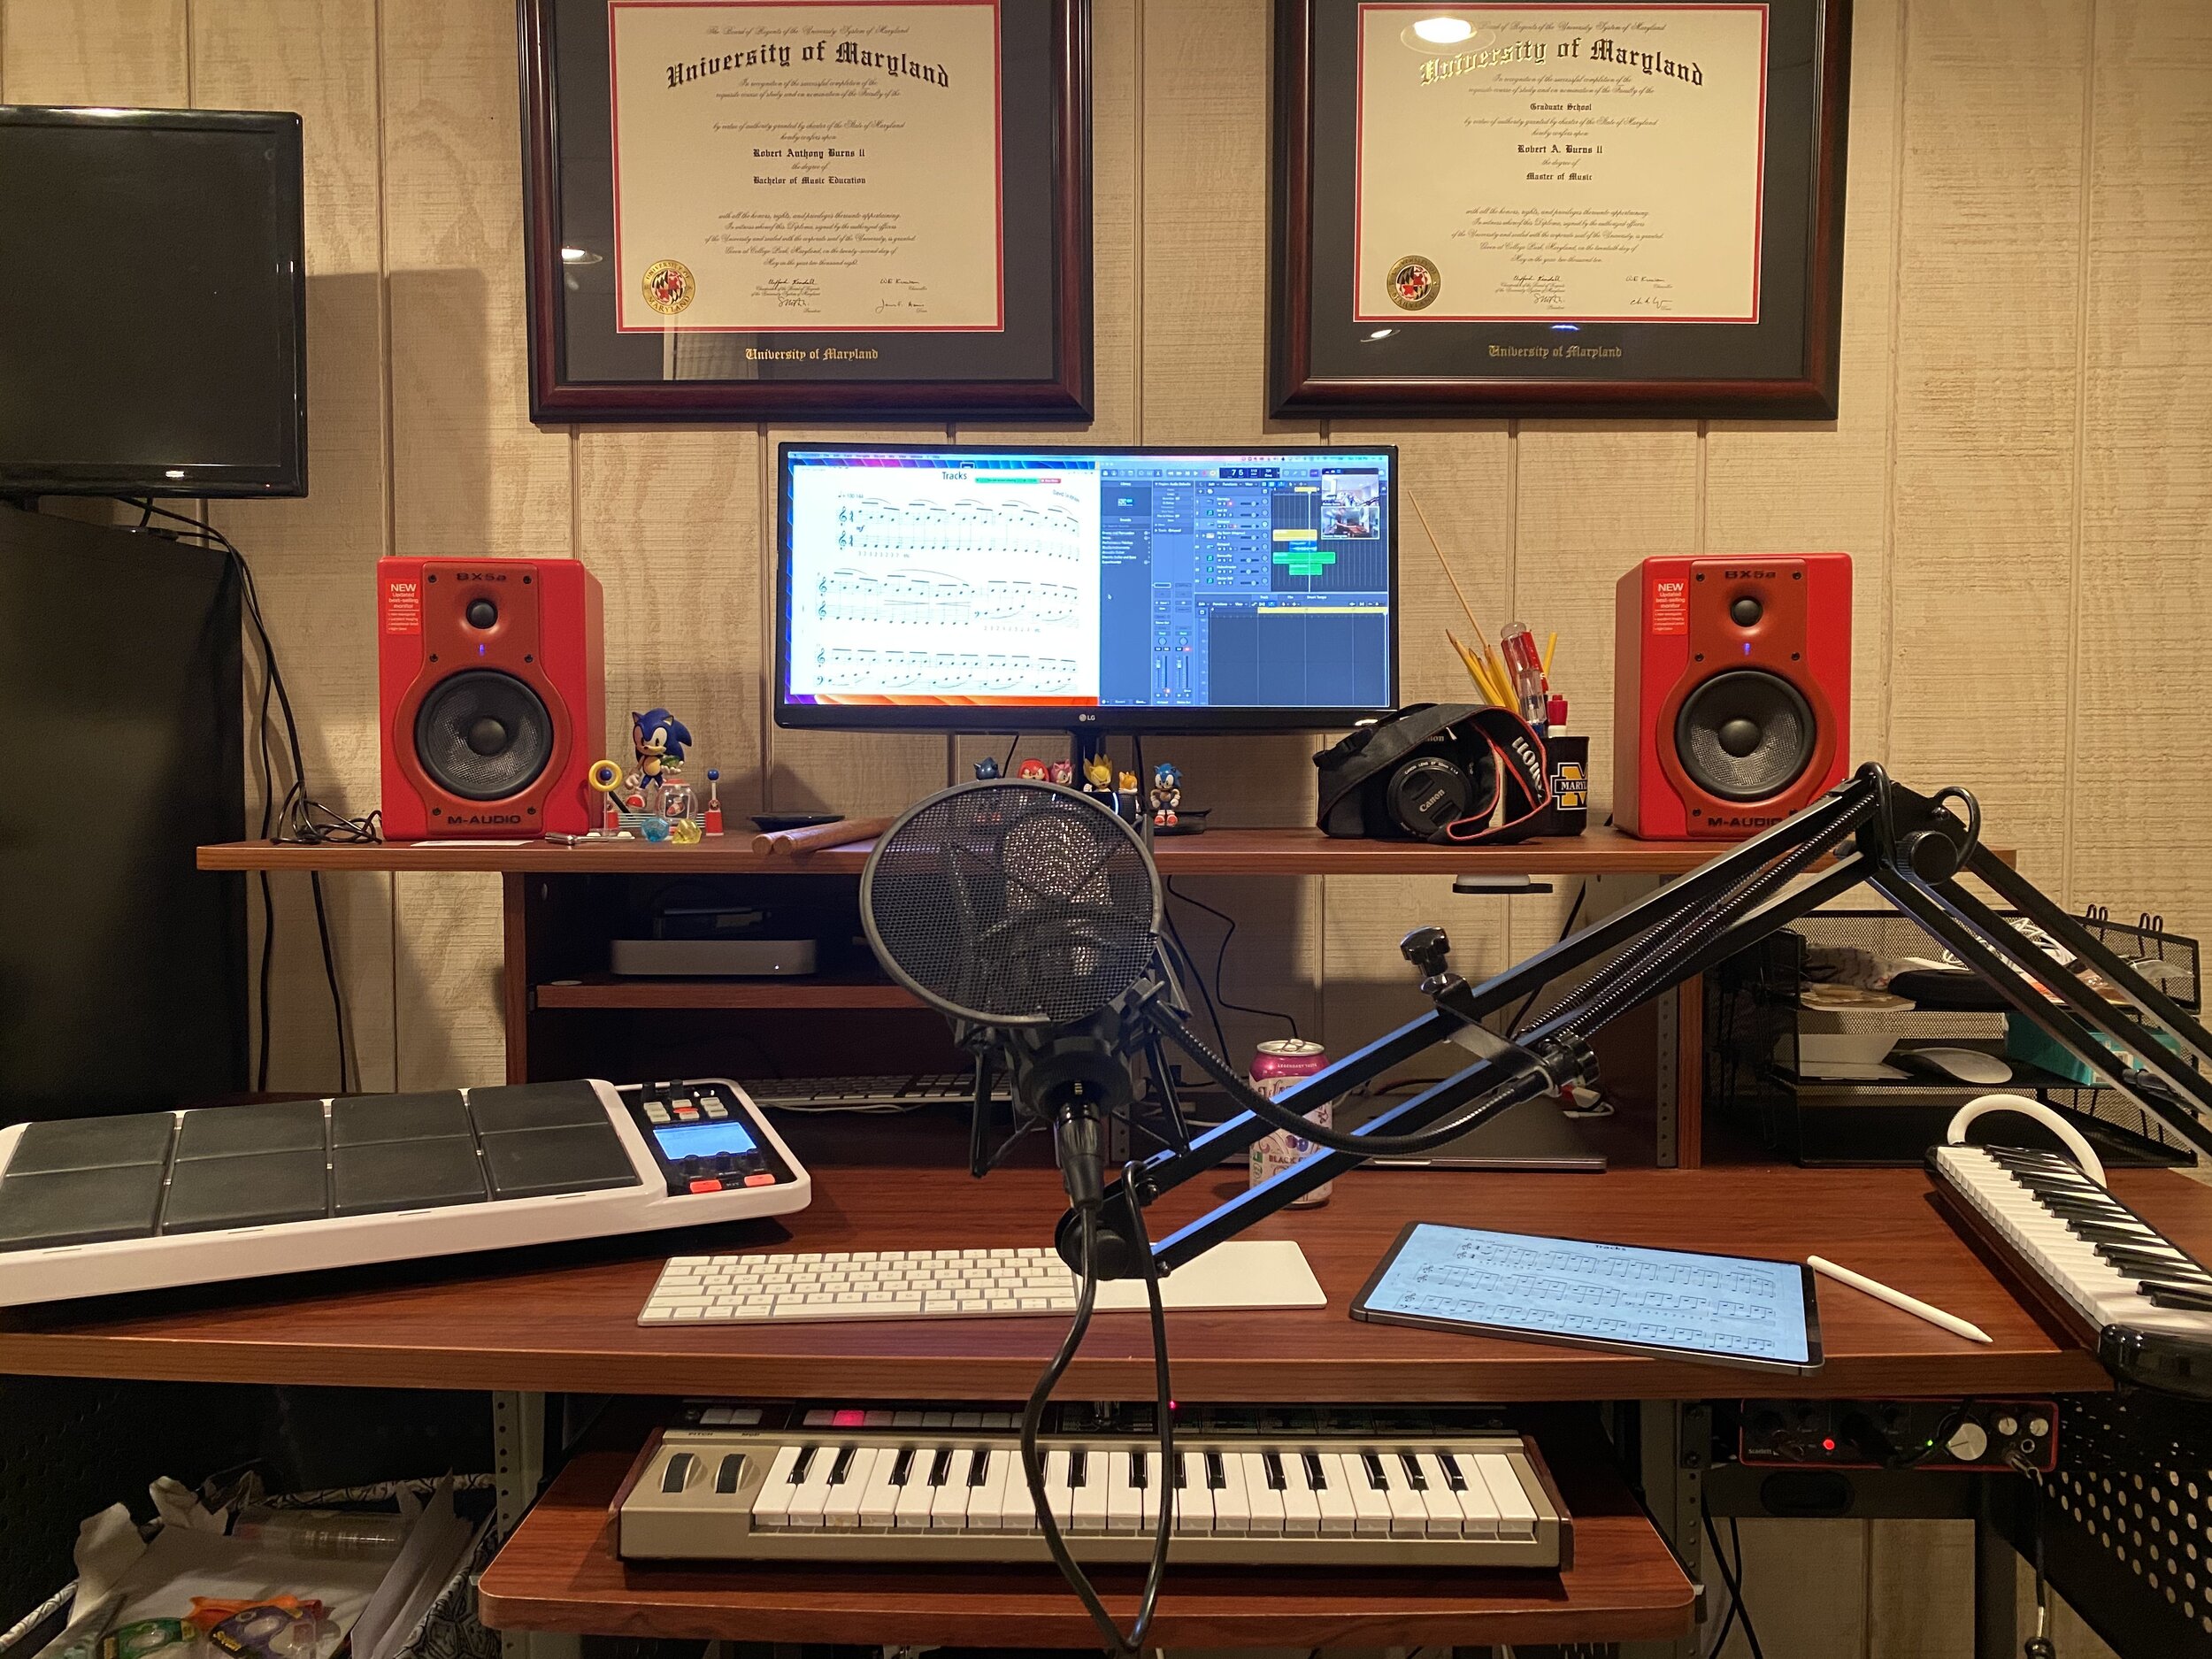
This post is not specific about the hardware I use. If you care about the brands and models of my gear, check out My Favorite Technology to read more about the specific audio equipment in my setup.
Theresa Hoover Ducassoux joins the show to talk about technology for teaching band at a distance, productivity methodologies, Google apps for personal and school use, Flipgrid, empowering students, and more…
Other topics:
Personal productivity systems and apps
The Getting Things Done Methodology
Teaching band online
Being creative with whatever teaching scenario and schedule your district is moving forward with this fall
Engaging students with musical performance using the Flipgrid video service
Google apps for personal productivity
Google apps for classroom teaching
Organizing files in Google Drive
Automating band warm ups
Chamber music breakout groups using Google Meet and Soundtrap
Getting Google Certified
Her book- Pass the Baton: Empowering All Music Students
Due is an indispensable app that I depend on daily on both iOS, the Apple Watch, and the Mac. There are three things that immediately come to mind when I think about why I like this app over the basic Reminders app.
Its design is beautiful, intelligent, and easy to read.
Its natural language parsing is a breeze… “remind me to help with lunch duty at 11:27 am” adds a reminder with the time just as I type it.
The swipe down gesture to add a new task is very intuitive.
By far, most important: you can set the notifications to keep pinging you until you check the task as done. You can even customize the amount of time it snoozes when you tap the snooze button.
I don't use this app to manage big projects. For that, I use OmniFocus. But for tasks that have to be acted on in a very specific moment, Due is the tool for the job.
It just got a major Mac update. Most of the changes are design focused, which I can appreciate because the Mac app, while it functioned, was starting to look pretty out of date. If you want to read more of the specifics, I recommend the MacStories article linked below.
A full-fledged task manager is terrific for many projects, but if you dump your entire life into one, it can quickly become a cluttered mess. At the same time, if you’re focused on a big project, it’s easy to let everything that’s not in your task manager slip through the cracks. One strategy for attacking the problem that has worked well for me is using a separate, lightweight app for tasks like remembering to take out the garbage, pick up medicine at the pharmacy, or publish an article when an embargo lifts.
In the past, I’ve used Due on the iPhone and iPad for these sorts of tasks. There has been a Mac version of Due for years too, but it hadn’t been updated in about two years and was showing its age. However, with today’s update, Due for Mac joins the iOS version with a fully-modern design and slate of new features, putting it on par with the outstanding iOS version, which I’ve covered in the past.
One of the reasons I continue using Apple products is that they work well together. The better the features work across devices, the less often users need third party software to get things done.
Now that iCloud Drive supports the sharing of files and folders, a lot of vocal Mac and iOS users have debated if they can finally let go of Dropbox.
Productivity master, David Sparks, had some things to say about it on his blog this week:
All that said, Dropbox still has many features that sure would be nice in iCloud, like a much better implementation of version history and deletion recovery. I was hoping we would get some more functionality for iCloud Drive this year at WWDC, but we didn’t. I was hoping I could throw Dropbox overboard. One less service and one less thing to pay for sure sounded nice.
For me, the major hole in iCloud Drive is that I cannot control what lives on my hard drive and what stays in the cloud. Both Dropbox and iCloud have a feature where they will smartly try to make this decision for you, uploading files you haven’t touched in months to the cloud so that they don’t take up hard drive space.
Sometimes I need the control to be able to tell a service to keep a folder or a file permanently downloaded, no matter what. And iCloud Drive still can’t do this task.
iCloud folder and file sharing are reliable in my use, but setting up the share is far less intuitive than Dropbox, which presents its options to you with clear iconography when you right-click on a folder or file in the Finder.
Why Apple can’t get right what Dropbox figured out over ten years ago still confuses me. Hopefully they will tweak it and make it better.
I am fortunate that my free Dropbox account is large enough that I don’t need to pay. iCloud remains my primary storage solution but I keep Dropbox around for miscellaneous purposes, including sharing with others who don’t use iCloud.
If you want to use Dropbox on a Mac, but avoid installing it, I recommend the app Transmit. While the app is marketed as an FTP client, it can also act as a Google Drive or Dropbox client, allowing you to upload, download, copy, and share files, using a native macOS experience, and without allowing Dropbox to run in the background.
<div class="
      image-block-outer-wrapper
      layout-caption-below
      design-layout-inline
      combination-animation-none
      individual-animation-none
      individual-text-animation-none
    ">


    <figure class="
          sqs-block-image-figure
          intrinsic
        " style="max-width:473px">


      <div class="image-block-wrapper">
        <div class="sqs-image-shape-container-element


          has-aspect-ratio
        " style="position: relative;padding-bottom:56.448204040527344%;overflow: hidden">


            <img src="https://images.squarespace-cdn.com/content/v1/5595df9ce4b0ce9ff9ecd1a8/1595768986115-FCA3C7CFPFFJGKZ1T7J5/iCloud+Dropbox+Question+Mark+image+for+blog+post+july+2020.jpg" alt="iCloud Dropbox Question Mark image for blog post july 2020.jpg" width="473" height="267" style="display:block;object-fit: cover;width: 100%;height: 100%;object-position: 50% 50%" loading="lazy">

        </div>
      </div>


    </figure>


</div>
<div class="
      image-block-outer-wrapper
      layout-caption-below
      design-layout-inline
      combination-animation-none
      individual-animation-none
      individual-text-animation-none
    ">


    <figure class="
          sqs-block-image-figure
          intrinsic
        " style="max-width:512px">


      <div class="image-block-wrapper">
        <div class="sqs-image-shape-container-element


          has-aspect-ratio
        " style="position: relative;padding-bottom:100%;overflow: hidden">


            <img src="https://images.squarespace-cdn.com/content/v1/5595df9ce4b0ce9ff9ecd1a8/1595452750007-D26OAX2RKZQIH3PLZ874/loopback%402x.png" alt="Loopback is an app that creates custom audio ins and outs for the Mac using the audio of other apps." width="512" height="512" style="display:block;object-fit: cover;width: 100%;height: 100%;object-position: 50% 50%" loading="lazy">

        </div>
      </div>


      <figcaption class="image-caption-wrapper">
        <div class="image-caption"><p class="">Loopback is an app that creates custom audio ins and outs for the Mac using the audio of other apps.</p></div>
      </figcaption>


    </figure>


</div>
Have you been teaching a class in Google Meet or Zoom and wanted to play a song from iTunes for your digital classroom? Or perhaps a YouTube video or any other application with audio?
Sure, you can play it right on your computer and let the audio from your speakers go straight back into the microphone input of your computer. This works ok in my opinion. But it isn’t going to produce a pure representation of the audio I am trying to send. And in some cases, it creates issues with echo, delay, or a nasty feedback loop.
So what do you do? Rogue Amoeba makes excellent Mac apps that, for lack of better explanation, hack into the audio system of your Mac. I have written about Audio Hijack here before, their app that allows you to record audio from other applications (and that’s just the start of all the powerful things it can do). Rogue Amoeba also makes an excellent utility called Loopback.
What does Loopback do? Think about your computer’s audio settings. You have an Input and an Output. The Input is, by default, your computer microphone, and the Output is the speakers. If you connect an audio interface that has higher quality microphone and speakers plugged in, you would need to set the Input and Output to that interface to get the input and out put the be the microphone and speakers, respectively.
<div class="
      image-block-outer-wrapper
      layout-caption-below
      design-layout-inline
      combination-animation-none
      individual-animation-none
      individual-text-animation-none
    ">


    <figure class="
          sqs-block-image-figure
          intrinsic
        " style="max-width:2224px">


      <div class="image-block-wrapper">
        <div class="sqs-image-shape-container-element


          has-aspect-ratio
        " style="position: relative;padding-bottom:55.035972595214844%;overflow: hidden">


            <img src="https://images.squarespace-cdn.com/content/v1/5595df9ce4b0ce9ff9ecd1a8/1595453574122-OW83Y83K7XW3RVX5EOY1/CleanShot+2020-07-22+at+17.31.48%402x.png" alt="Usually my computer microphone is a Device that can be set to the computer’s Input. In the scenario above, Loopback has allowed me to combine the audio from my microphone and the Music app into a new audio Device called “Music+Mic” that can be selec…" width="2224" height="1224" style="display:block;object-fit: cover;width: 100%;height: 100%;object-position: 50% 50%" loading="lazy">

        </div>
      </div>


      <figcaption class="image-caption-wrapper">
        <div class="image-caption"><p class="">Usually my computer microphone is a Device that can be set to the computer’s Input. In the scenario above, Loopback has allowed me to combine the audio from my microphone and the Music app into a new audio Device called “Music+Mic” that can be selected as the input of my Mac or any individual app.</p></div>
      </figcaption>


    </figure>


</div>
Your Inputs and Outputs can be controlled from the Sound settings of your computer. Some audio apps also let you control how, specifically, they behave. For example, I have manually set up GarageBand and Skype to use my audio interface as the Device I use for input so that whether I am recording for my podcast, or simply catching up with a relative, they hear me through the microphone, no matter what Device my Mac’s audio Output is set to in the System Preferences.
Loopback allows you to create Inputs and Outputs that are accessible to your Mac’s Sound settings as well as your apps. In the example above, I have created an Input that combines my Mac’s microphone (the usual Input) with the output of the Apple Music app, something I might want to use to play a recording example for my students in a Google Meet.
<div class="
      image-block-outer-wrapper
      layout-caption-below
      design-layout-inline
      combination-animation-none
      individual-animation-none
      individual-text-animation-none
    ">


    <figure class="
          sqs-block-image-figure
          intrinsic
        " style="max-width:1560px">


      <div class="image-block-wrapper">
        <div class="sqs-image-shape-container-element


          has-aspect-ratio
        " style="position: relative;padding-bottom:78.20512390136719%;overflow: hidden">


            <img src="https://images.squarespace-cdn.com/content/v1/5595df9ce4b0ce9ff9ecd1a8/1595452699201-P28K84NUK3AWBKDPOE50/CleanShot+2020-07-22+at+17.06.46%402x.png" alt="Selecting my new audio Device from the System Preferences." width="1560" height="1220" style="display:block;object-fit: cover;width: 100%;height: 100%;object-position: 50% 50%" loading="lazy">

        </div>
      </div>


      <figcaption class="image-caption-wrapper">
        <div class="image-caption"><p class="">Selecting my new audio Device from the System Preferences.</p></div>
      </figcaption>


    </figure>


</div>
Look now as I go to my computer’s Sound settings, and I can select this new custom Input to be used across the entire operating system! This way, when I am in a Google Meet, students are hearing both me speaking through the mic and all of the output of the Music app.
<div class="
      image-block-outer-wrapper
      layout-caption-below
      design-layout-inline
      combination-animation-none
      individual-animation-none
      individual-text-animation-none
    ">


    <figure class="
          sqs-block-image-figure
          intrinsic
        " style="max-width:2500px">


      <div class="image-block-wrapper">
        <div class="sqs-image-shape-container-element


          has-aspect-ratio
        " style="position: relative;padding-bottom:62.519996643066406%;overflow: hidden">


            <img src="https://images.squarespace-cdn.com/content/v1/5595df9ce4b0ce9ff9ecd1a8/1595452726313-QK1V1G3GMW9N3C0GMI23/CleanShot+2020-07-22+at+17.06.14%402x.png" alt="Now I can route my band warm up tracks, reference recordings, or any other audio I desire, into my Google Meet classrooms." width="2500" height="1563" style="display:block;object-fit: cover;width: 100%;height: 100%;object-position: 50% 50%" loading="lazy">

        </div>
      </div>


      <figcaption class="image-caption-wrapper">
        <div class="image-caption"><p class="">Now I can route my band warm up tracks, reference recordings, or any other audio I desire, into my Google Meet classrooms.</p></div>
      </figcaption>


    </figure>


</div>
New app for creating virtual ensembles coming next month. Click the link to read more information directly from the developer’s website and sign up to be notified when it is released.
Choir Creator is the easiest way to organize and produce a virtual choir video. Releasing to the United States and Canada in August 2020 for iPhone and iPad running iOS 12.4 or later.
From the YouTube demo on the developer’s website, it looks like the workflow solves nearly all of the friction of this process. The business model of charging the teacher a considerable (but reasonable) amount of money and nothing to the student is solid.
That said, this process does not leave a lot of room for control. I would like to be able to, for example, turn up the tuba if it isn’t loud enough. I can think of numerous other ways that I would want to exercise more control than the output of this app would allow. That said, there is a strong market for software that makes it this easy. I think it may do well.
It’s iOS only at launch, which is not a surprise, but will limit school systems where students are using Chromebooks.
Edit: I have spoken with the developers of this app. They informed me that Choir Creator will support basic audio editing features at launch, like changing the volume and panning of each track. They said they have more audio editing features to come. Good to know!
At WWDC, Apple’s software developer conference last month, they announced that the Mac will be moving to the same chip architecture as iOS devices. One of the many benefits of this move will be that iOS apps will run on the Mac natively.
CDM had an interesting immediate reaction to this news.
Apple’s announcement of moving the Mac from Intel to ARM is no surprise. But here are the details most relevant to your tools – and why we’re in a new era on both the PC and the Mac.
And TL:DR – the change on the Mac platform has a lot to do with Apple’s App Store ecosystem and blending the iPad and Mac platforms. But looking at the big picture, we aren’t so much post-PC as post-Intel. All vendors, not just Apple, are starting to eye chips other than Intel’s even on the x64 architecture.
I am really excited about this possibility for a number of reasons. There are a ton of iOS apps I would love to use the Mac (I am looking at you Tonal Energy and forScore). But then I got thinking about how big and diverse the iOS App Store is, and what some of the edge-case effects of iOS apps on the Mac could be.
Let’s think about audio plugins for a moment. iOS doesn’t have a robust architecture for integrating third party audio apps into larger ones like GarageBand. But it does has a lot of these audio apps. My understanding is that iOS plugins are Audio Units with the .AU extension, just like ones you would install in a DAW on MacOS.
So my assumption is that that an audio app for iOS like Brusfri could run inside of Logic alongside all of your other plugins. This may be a bad example considering Brusfri has a Mac version already but you get the idea.
I think this will only help the Mac. It could be mildly disruptive to the audio plugin market because iOS plugins are so much cheaper than things like, for example, Waves but ultimately, people who want Waves will still buy Waves. I am optimistic that this change will simply mean more apps for everyone, more variety of apps, and more variety of price.
The school year is finally over, as is my first ever quarter of online teaching.
I wanted my students to end the year seeing themselves represented together, playing the same music, at the same time. So I sharpened my Final Cut skills and dove into the process of making a virtual ensemble.
The video in this post gives an overview of my process for making these videos, all the way from making a play along track, to advanced editing such as pitch and rhythm correction. The video includes a couple of my favorite Mac utilities for manipulating audio and video files. Scroll to the bottom to see all of the final videos of my students.


You must be logged in to post a comment.